Monthly Archives: February 2014

Thrillbillies Fishing

Thrillbillies 1Photo by: Marty Smith
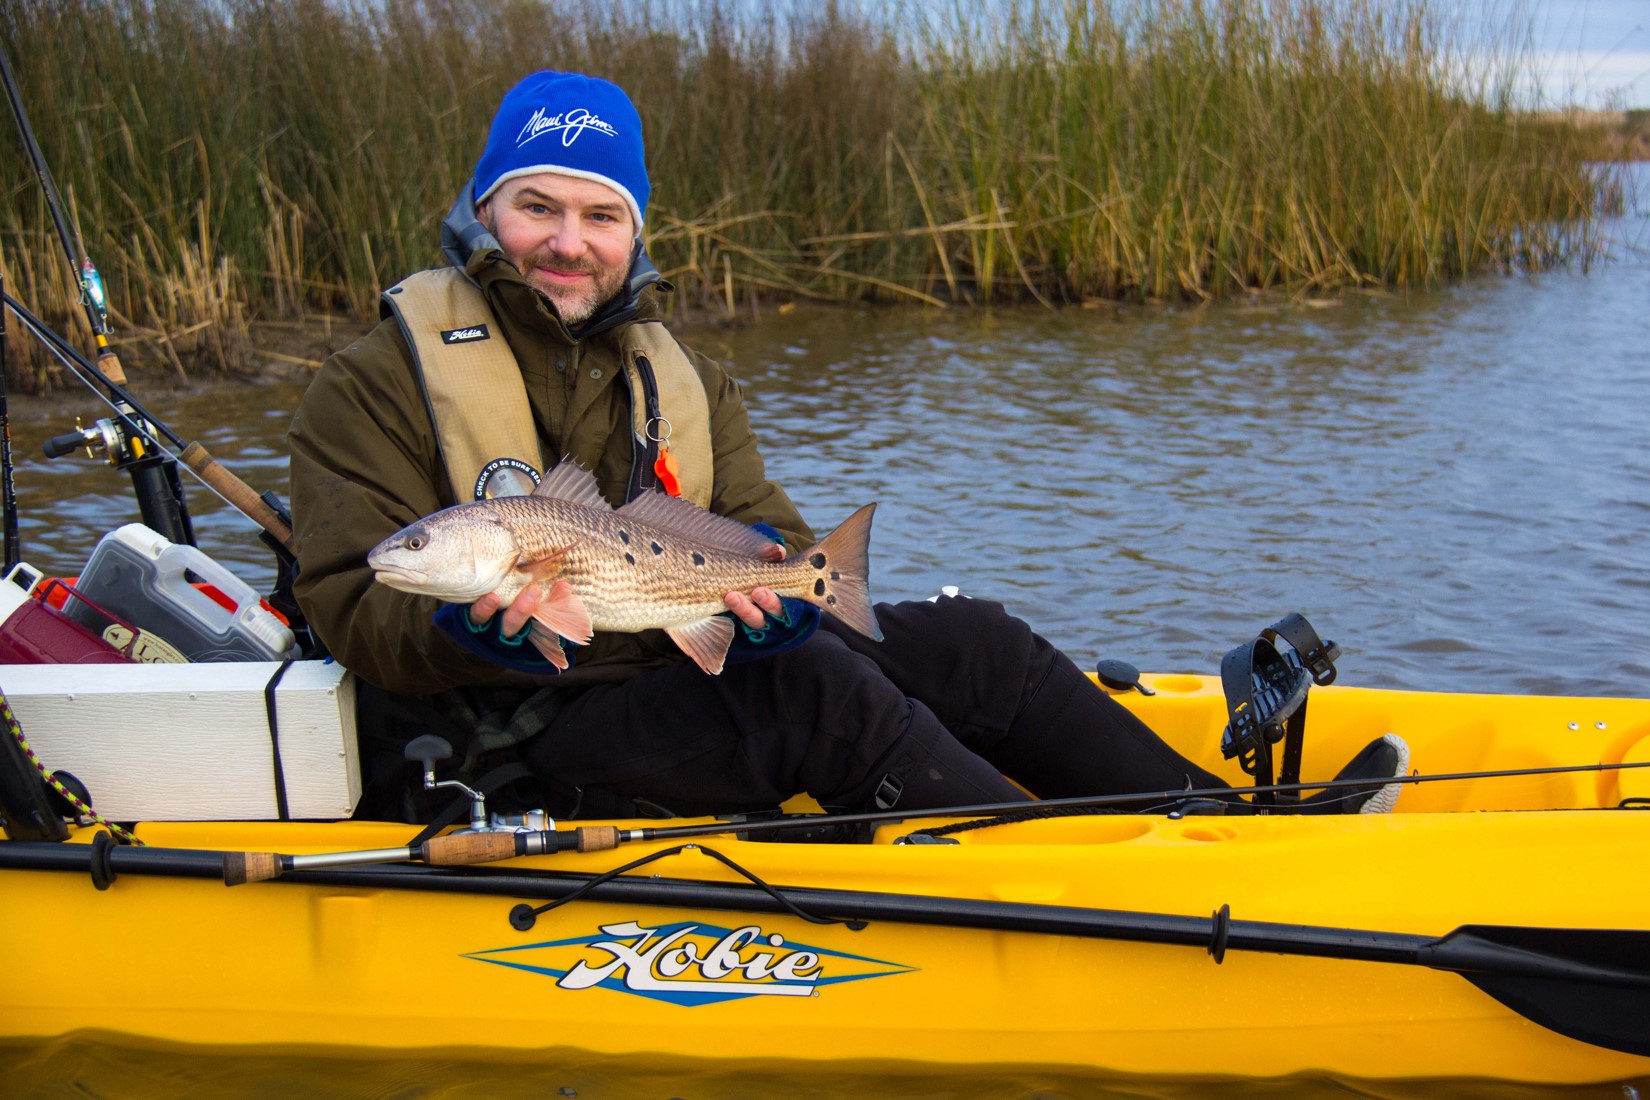
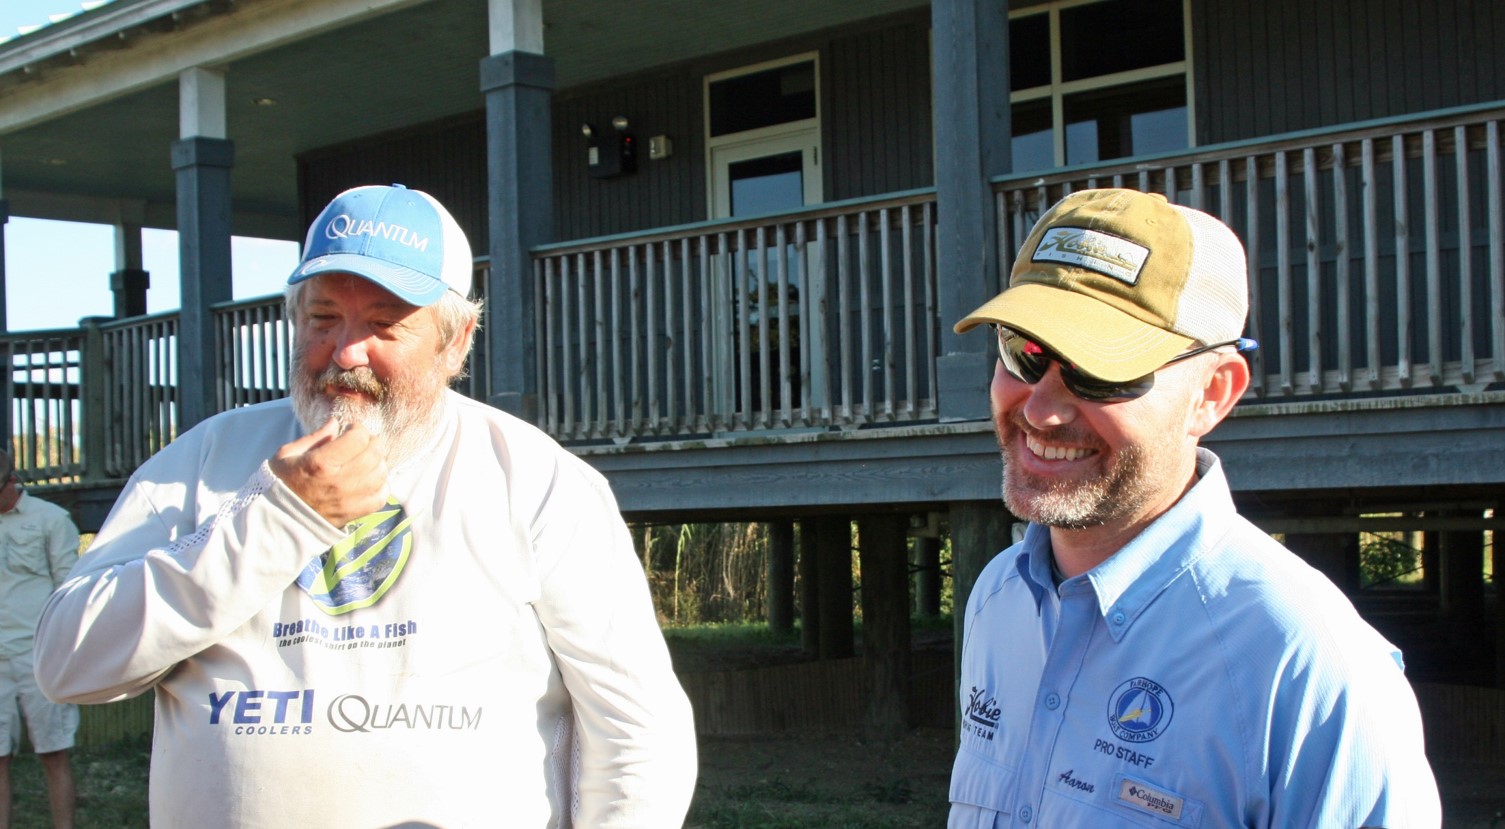
Stacey Martin (left), founder of Thrillbillies Fishing, and I celebrating Stacey’s 2nd place finish in the redfish category at the 2013 Mobile Bay Kayak Fishing Association 5 Rivers Tournament

When I moved to the Mobile Bay area five years ago, I met a funny guy who I would later learn was a darn good fisherman.  And then, using his own words he compliments friends by, I found out what an even better person he was.

Stacey Martin, founder of thrillbilliesfishing.com, is one of the best anglers I know in the Mobile Bay area.  He has uncovered decades of very reliable knowledge, trends and successful techniques for our bay area that catch fish.  I enjoy targeting a wide array of species, and Stacey does too.  He’s one of the top bowfin (grinnel) tour anglers in the south and places in nearly every saltwater inshore tournament I’ve competed against him in.  I’ve even seen a short film he produced where he caught a tiger shark in the Gulf!

I have also been impressed that he takes the time to develop our new generation of anglers.  Whether it’s techniques or the products he finds useful to fish with, he’s a wealth of information.  Stacey decided to launch a website recently.  Check it out!  I think you’ll enjoy his future fishing reports, product reviews, blog, fishing adventures, and the fun short films too!

Click here to find Thrillbillies Fishing!

Copyright 2012, 2013 by icastinayak.com. All rights reserved

How to Tag a Fish, with the Louisiana Dept of Wildlife & Fisheries

I spent a day on the water with the Louisiana Department of Wildlife and Fisheries, recording how to properly tag a fish and becoming familiar with the Tag Louisiana conservation program.  Video originally published in Kayak Angler Magazine.

Thank you to The Backpacker of Baton Rouge and the Fairhope Boat Company for providing use of kayaks during the day in beautiful south Louisiana.

Copyright 2012, 2013 by icastinayak.com. All rights reserved

Leopard Redfish

Leopard Redfish 1Photograph by: Jameson Redding
Angler: Aaron Rubel, with a fourteen spot leopard redfish

I was Informed Sunday evening that this 20.75″ redfish with fourteen spots (eight on one side) earned me first place in the leopard redfish category of the month long 2014 Great Days Outdoors Magazine New Years Tournament!


This fish hit three or four feet from the bow of my Hobie Outback kayak.  A great example of how stealthy a kayak can be.

It’s not all that rare to catch a redfish with more than one spot, although fourteen spots on a fish of this species is not so common either.  The characteristic is passed down through the family lineage of the fish, determined by combinations of dominant and recessive genes.  The most common is for a redfish to display one spot on each side, at base of the tail.  One spot on each side of a redfish can be compared to the most common eye color for humans being brown.  More spots, on the other hand, can be compared to the small percentage of blue eyed humans through combinations of dominant and recessive genes passed down through family DNA.Leopard redfish are beautiful creatures, and I’m thankful to have been able to spend a few minutes up close and personal with this one.


Leopard Redfish 2

Copyright 2014 by icastinayak.com. All rights reserved

How To Make a Fish Measuring Board

Fish measuring board 1Having a good measuring device on board the kayak is important to me.  There a few features that are great to keep in mind when making your own.  A white background for easy viewing of fish in pictures is key.  If you are going to participate in online tournaments, having black measurement dimensions against a white background makes it easier for you as an angler to take a photo that will be accepted by the tournament staff.  Select a floatable material, because you will drop it overboard.  Selecting a widely recognized measuring tape to assemble is paramount if you plan on using it for tournaments too.  Lastly, identification tokens that are given to the angler for tournaments are lost all the time.  Purchase a lanyard and insert the ID token.  This will guarantee the token is always on your board and because the board floats, you need not worry about it sinking to the bottom if you drop it.  Additionally, it will decrease the time the fish is out of water because you won’t need to look for the token when a fish is landed.

Below, you can build your own measuring board with step by step instructions.  Also included is a way to make efficient use of space in your kayak by a method of hanging it on a milk crate behind your seat.
Fish measuring board 2Supplies: Approximate cost at time of blog entry, not including tools is $29.50

Fine tooth saw
Metal white primer
Goop – Clear, waterproof
Fourteen #8 x 3/4 stainless self piercing screws

Tape measure
180 grit sandpaper
Right angle for scribing
Pencil
One piece of 8′ x 5 7/8″ x 5/16″ white FLT Trim board sold at Home Depot
1.5 hours of time
Fish measuring board 3

This is the FLT Trim serial number to look for at Home Depot that will serve as the body of the measuring board.

Fish measuring board 4Measure first cut at 40 1/4″.  Feel free to make it as long as you like, but I chose this dimension because of the storage length available behind seat, avoiding interference with rudder deployment / rotation.

Fish measuring board 5
Clamp and cut.  Cut second piece same length.

Fish measuring board 6After every cut, sand edges.  Thinking ahead to next step, you want to assemble smoothest surface inside where fish will be measured.

Fish measuring board 7 Apply waterproof Goop to edge of interface. 

Fish measuring board 8Secure ten screws along interface.

Fish measuring board 9Size nose plate.
Fish measuring board 10Scribe line for cut of nose plate.  This is the time to also make sure and strip cut your vertical wall for appropriate thickness of the largest fish that you normally target.

Fish measuring board 11Add radii for exposed corner of nose plate.

Fish measuring board 12                           Fish measuring board 13

Screw in nose plate of device, after adding Goop adhesive.

 Fish measuring board 14Spray screw heads with white primer for added protection from salt.  Assembly of device complete!  See next step for info on measuring tape.

Fish measuring board 15Add a measurement tape to device along bottom plate, using inside vertical surface of nose plate as datum.  Measuring tape secured with clear packing tape.  A widely recognized tape can be found at http://www.321fish.com/pages/store

Fish measuring board 16Rubber bands wrapped around end of measuring tape is useful to pinch tail while taking photo for optimum length.  Slide off rubber band from measuring tape, then slide onto tail of fish to pinch.

When you’re at the hardware, also purchase drawer knobs for securing measuring board to crate.  I chose a ball type knob so to make it easy to slide board on and off from crate, while at same time providing a secure hanging method.  I’ve used this for a year and a half and the board has never fallen off.  When you arrive home, screw the drawer knob to the milk crate and assemble nut.

Fish measuring board 17This is a view of the finished product, hanging on the crate.  The 12″ bungee shown at front and rear are dual purpose.  They hold board onto crate, but also help to keep fish in board while measuring.  So often, fish flop out of the board and into the water from kayak.  This helps to keep them in, but avoiding squeezing the fish.  Be careful to position front bungee so that it doesn’t slide into gill of fish.

Fish measuring board 18To assemble to crate from seating position on kayak, hook rear bungee to rear knob.

Fish measuring board 19Then swing front into ball and wrap over.  It works easily while seated in kayak.

Fish measuring board 20View from rear of board.

Fish measuring board 21

Now that you’ve got a great measuring board, get out there and catch some fish!


Copyright 2014 by icastinayak.com. All rights reserved